Markdown Editor
Table of contents
Overview
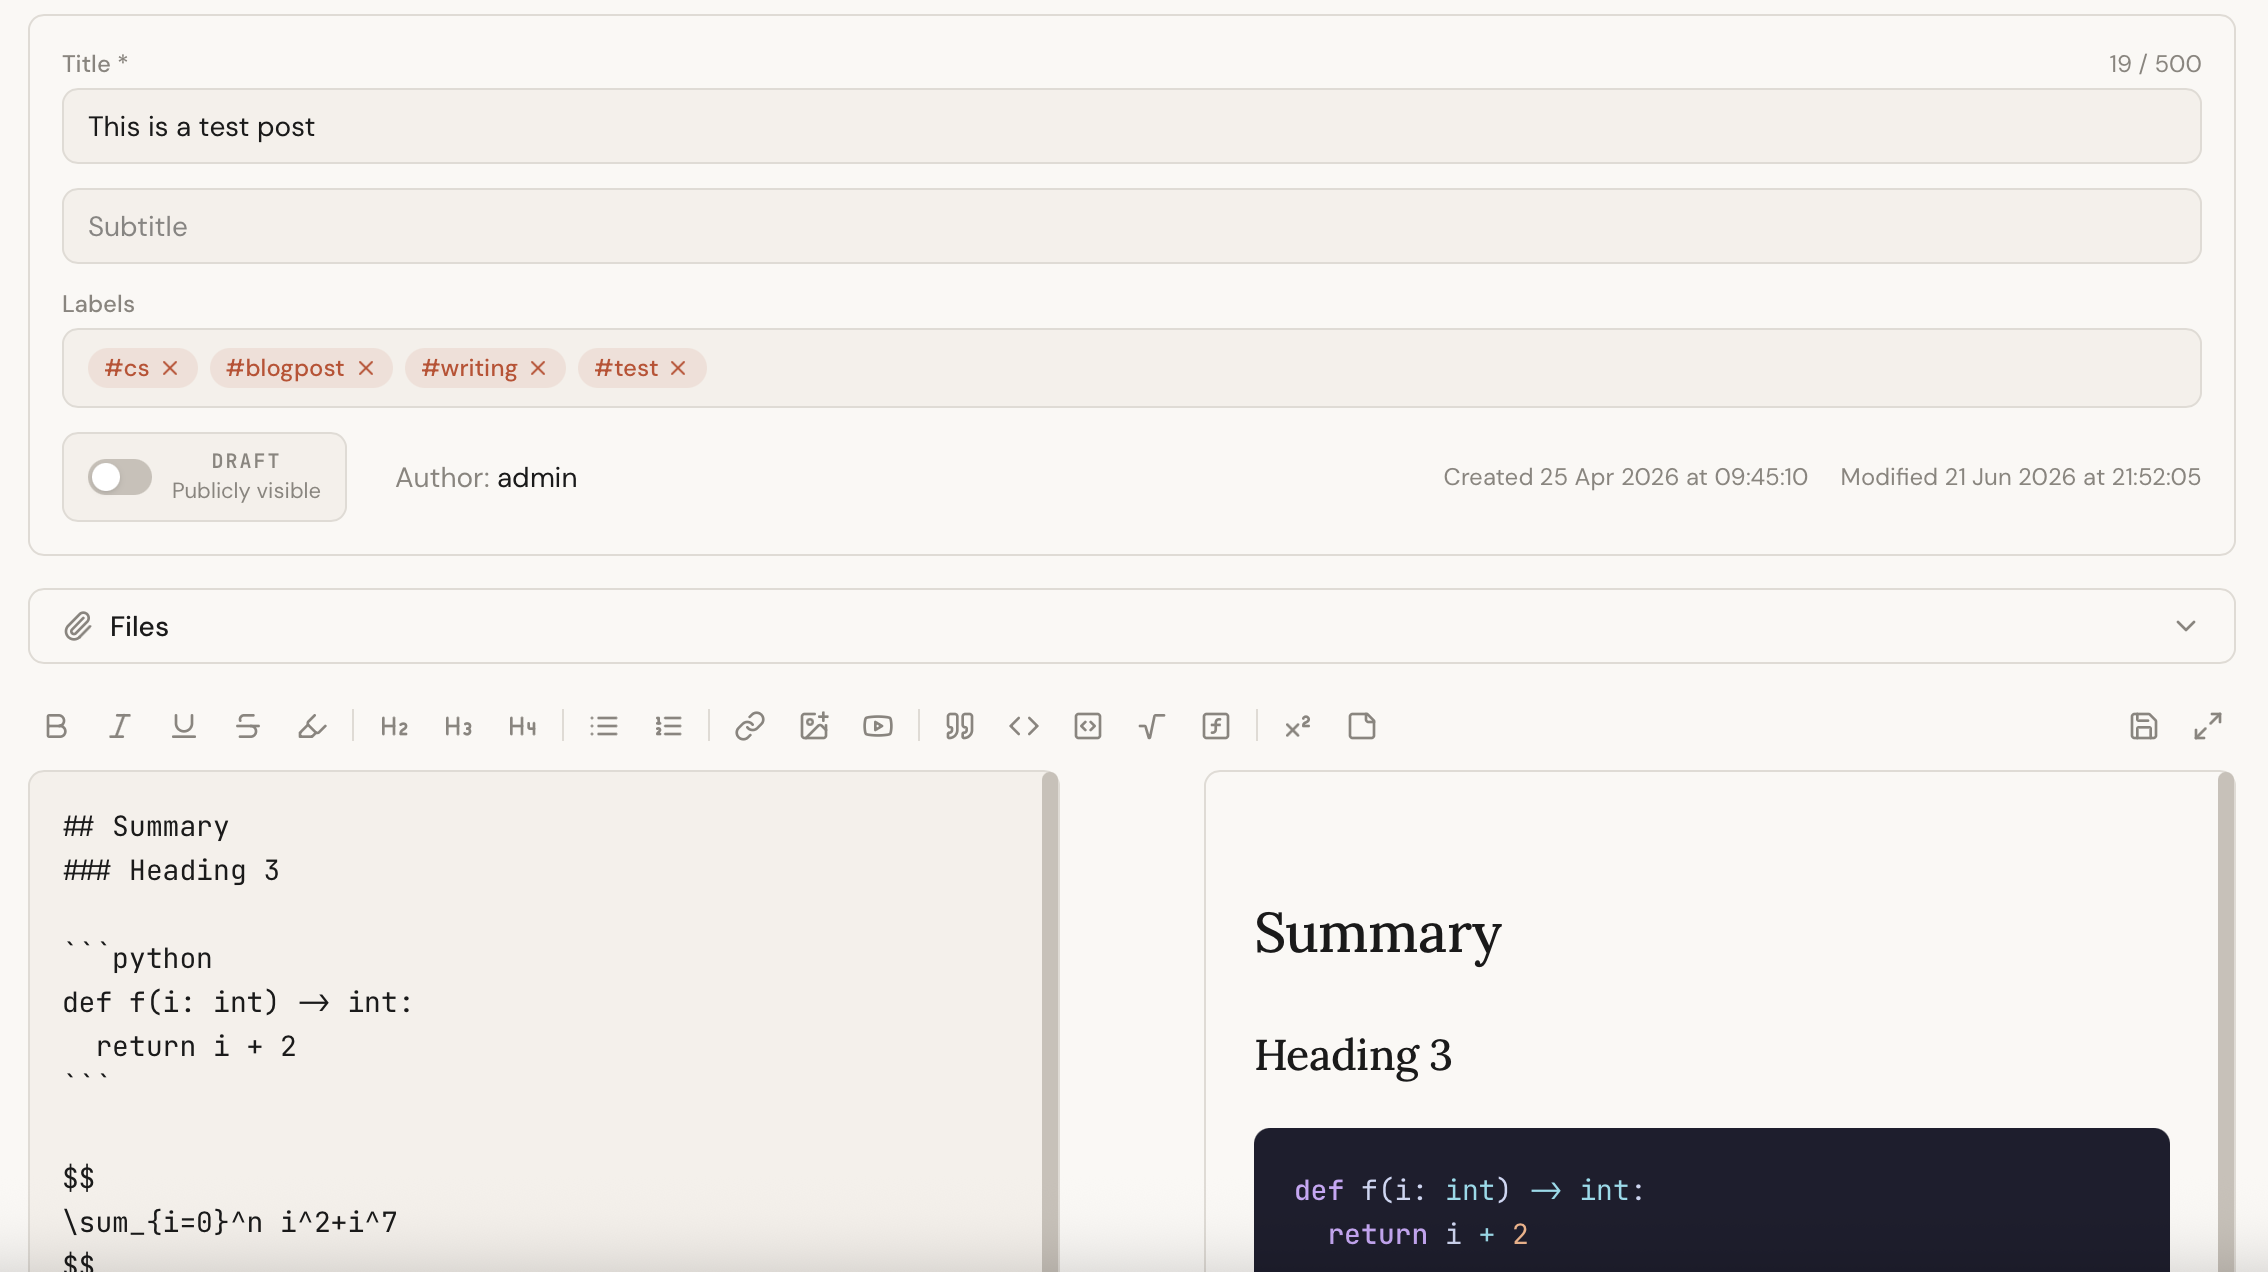
AgBlogger includes a built-in web editor for writing posts: Markdown on the left, a live preview on the right that updates as you type. You don’t have to remember Markdown syntax — a toolbar covers the common formatting — but you can type it directly if you prefer.
The web editor is optional. You can just as well write posts on your computer in any editor and bring them in with the sync tool — the post format is the same.
Post details
Above the editing area you set everything about the post:
- Title and an optional Subtitle.
- Labels — type to add a label (for example
#cooking), then pick an existing one or create a new one. Labels group related posts and power the visual label map. - Draft toggle — keep a post private while you work on it, then switch it to Publicly visible to publish.
- Author and the Created and Modified dates are shown for reference.
Formatting toolbar
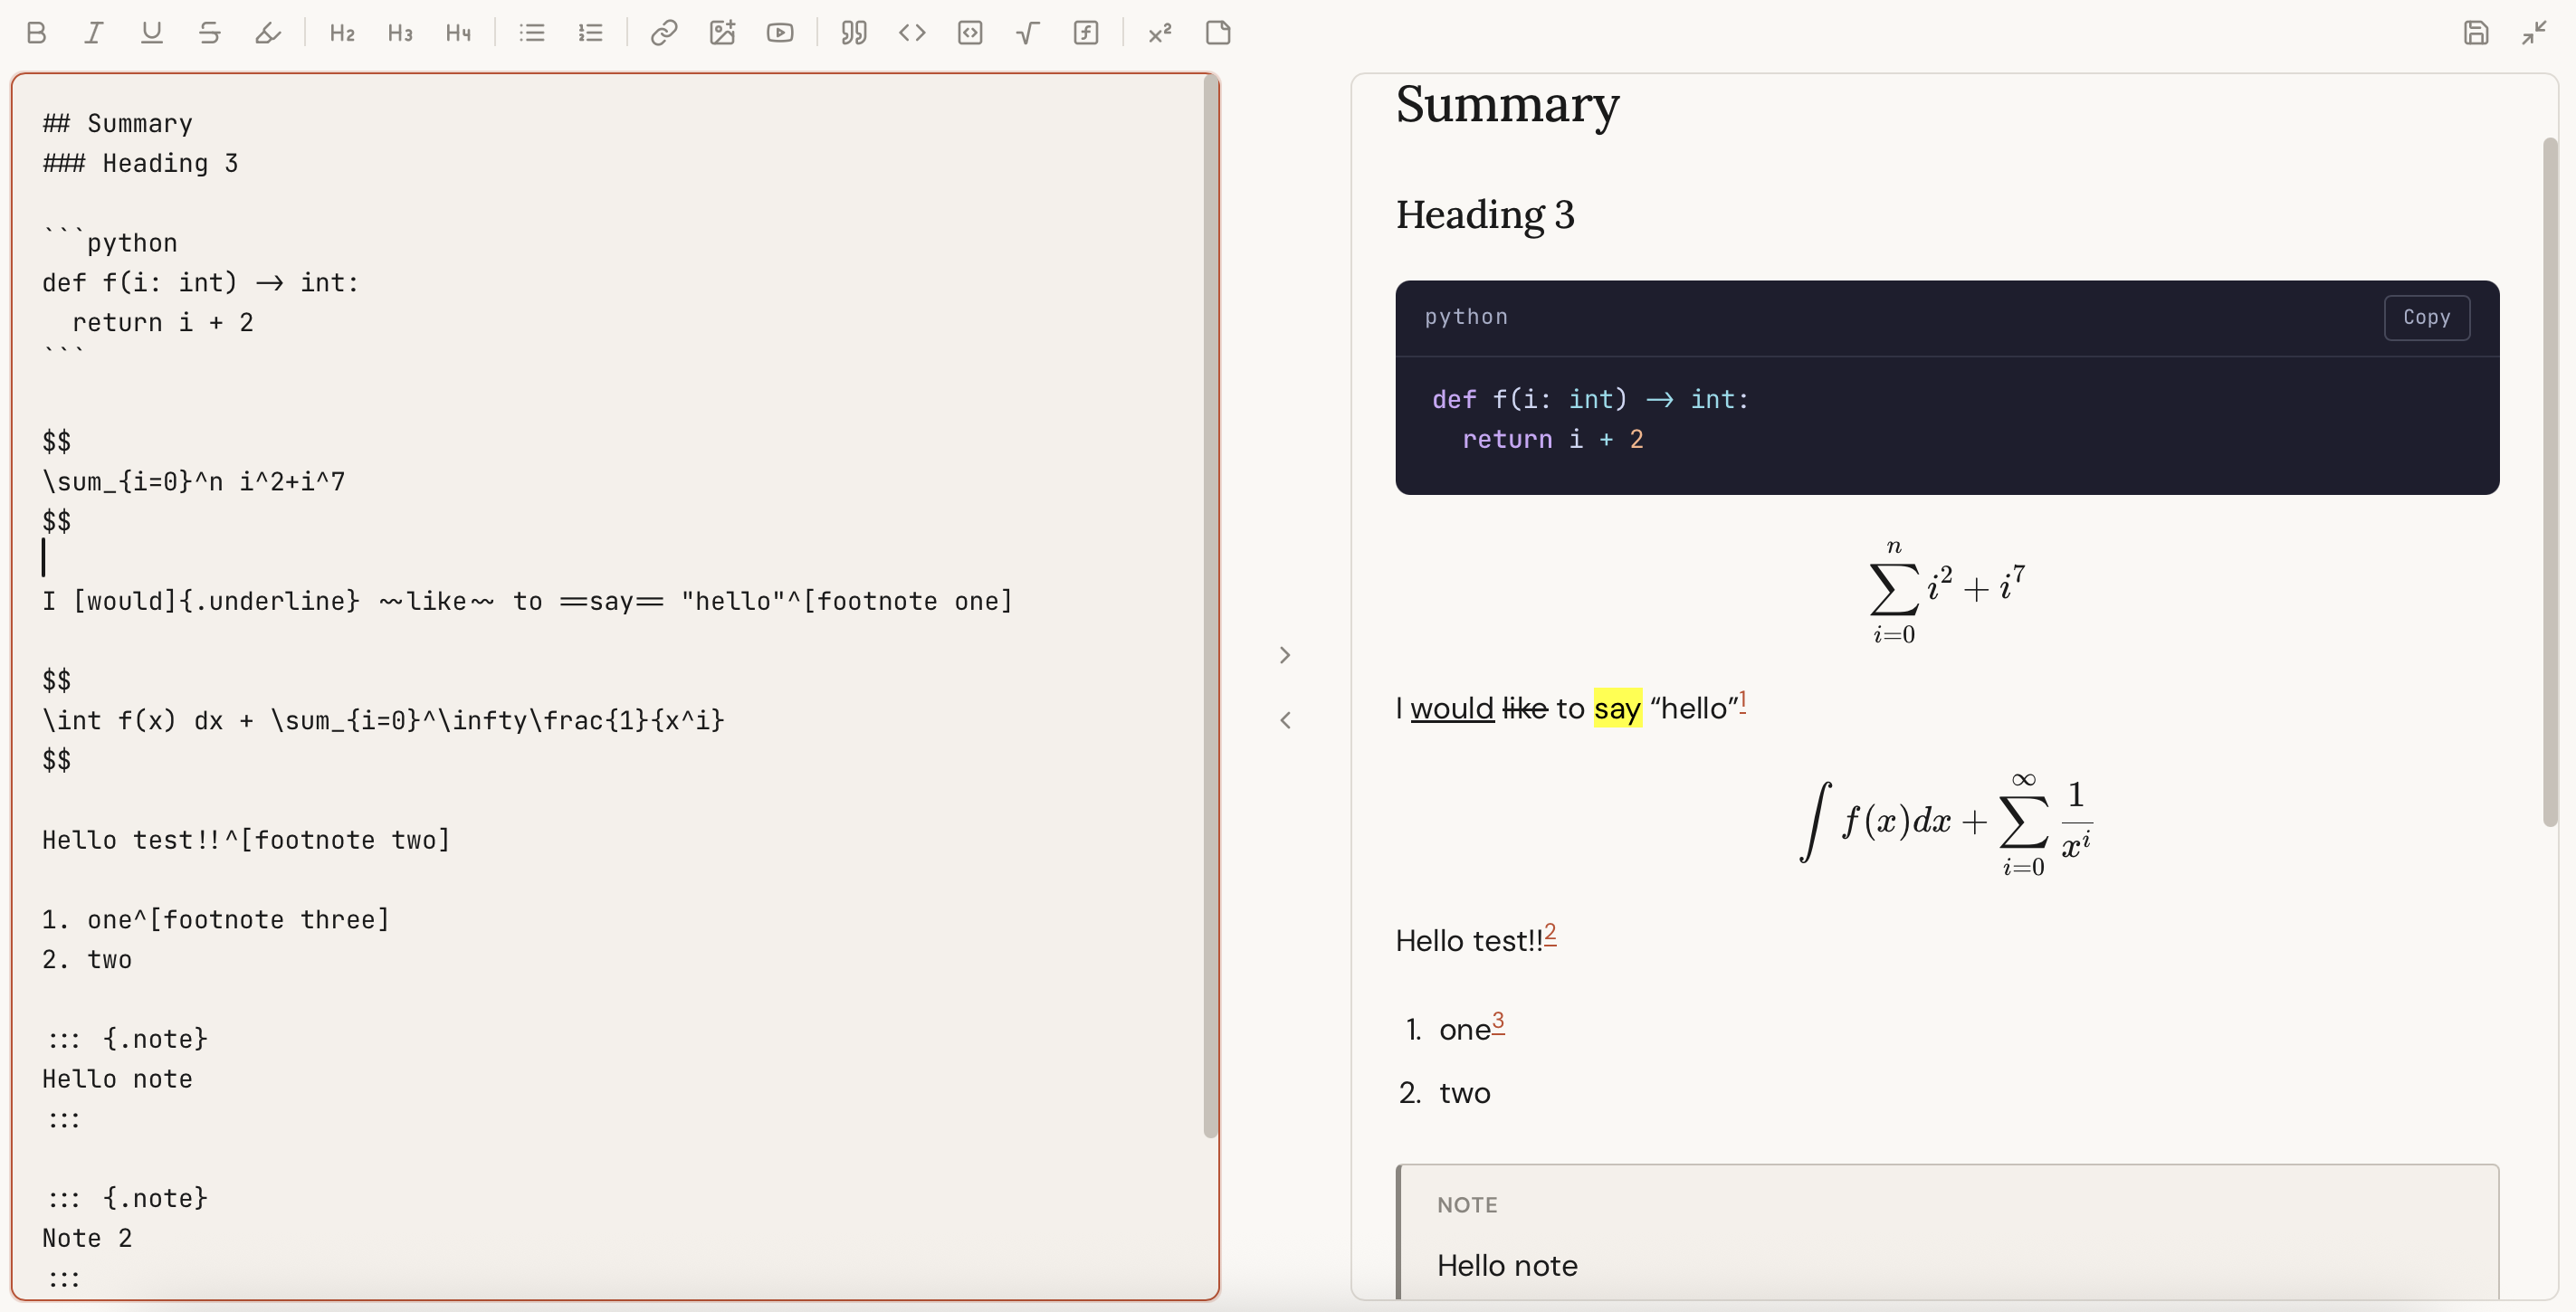
Each toolbar button wraps the selected text or inserts a snippet for you:
- Text — bold, italic, underline, strikethrough, and highlight.
- Headings — second-, third-, and fourth-level headings.
- Lists — bullet and numbered lists.
- Links and media — links, images, and YouTube embeds.
- Code — inline code and fenced code blocks.
- Math — inline and block LaTeX formulas.
- Extras — block quotes, footnotes, and note callouts.
The preview renders everything the way readers will see it, including syntax-highlighted code, LaTeX math, footnotes, tables, callouts, and embedded videos.
Fullscreen mode expands the editor and preview to fill the window. Press Esc to exit.
Files and images
Once a post is saved, a Files panel lets you attach images and other files (up to 10 MB each). Use the toolbar’s Image button to upload a picture and drop it into the post at the cursor, or attach a file and choose Insert to add a link to it. You can rename or delete attachments at any time, and references in your post are updated for you.
Saving
- Press Ctrl/Cmd+S or click Save to store your changes.
- While you’re editing, the editor keeps a local backup of unsaved work — if you reload or close the tab by accident, it offers to restore what you had.
- If your social accounts are connected, you can cross-post to them straight from the editor when you publish a post.